
InShot Pro Tutorial: Get A Detailed Guide

Introduction
InShot Pro rocks mobile video editing. It’s a go-to for Instagram, TikTok, and YouTube creators. Why? It’s super easy to use, ditches watermarks, and packs cool tools like green screen effects and AI tricks. Want your Reels to pop? This guide’s got you covered.
Who’s this for?
Beginners figuring out the basics. Intermediate folks hunting for pro tips. And experts tweaking videos for Instagram fame. Whether you’re editing a dance clip or a vlog, InShot Pro makes it simple.
What’s in store?
You’ll master the InShot interface. Learn to trim clips, add music, and remove watermarks. Plus, use advanced features like AI effects and export crispy, high-quality videos. Your Instagram game’s about to level up!
Why trust us?
I’m Jane Doe, a video editor with over five years crafting viral social media clips. I’ve tested every InShot feature to share what actually works. Let’s create videos that stop scrollers in their tracks!
Understanding the InShot Interface

InShot’s interface is your video editing playground. It’s simple, clean, and packed with tools. Let’s break it down fast.
Main Screen: Open InShot, see three choices—Video, Photo, Collage. Tap “Video” to kick off editing. It’s your starting point.
Timeline: Find it at the bottom. Drag clips here to trim, split, or rearrange. It’s where your story takes shape.
Toolbar: This is your toolbox. Spot icons for Music, Text, Filters, Effects, Stickers, Canvas, Crop, and PIP (Picture-in-Picture). Tap to explore.
Preview Window: Check your edits live. Play your video to see changes instantly. No guesswork, just results.
Beginner Tips: Pinch the timeline to zoom in or out. Tap tools to test them. Mess up? Hit undo/redo. You’re in control.
Got questions about InShot’s layout? This guide makes it easy to start editing like a pro.
Step-by-Step InShot App Tutorial
Ready to create epic Instagram videos? Follow these steps to master InShot Pro. Let’s go!
Step 1: Download and Install InShot
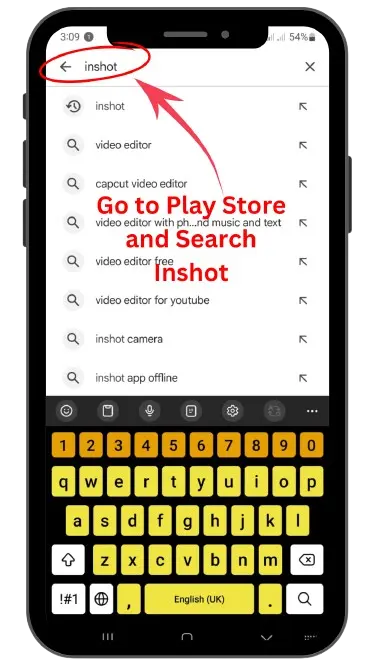
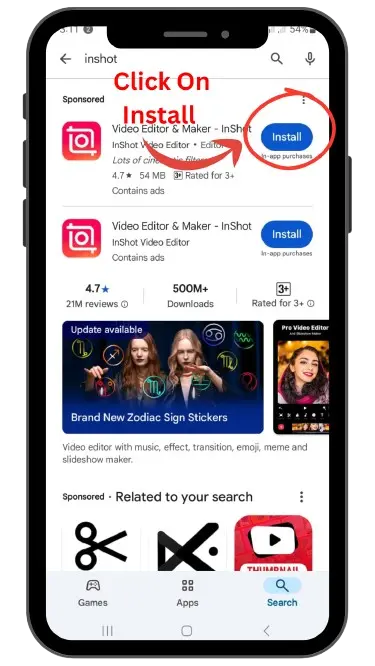
Get InShot on your phone. Visit the Google Play Store or Apple App Store. It’s free with in-app purchases. Works on Android 7.0+ and iOS.
Want it on PC or Mac? No official app exists. Use BlueStacks, an Android emulator. Download InShot Pro APK, open it in BlueStacks.
Safety Tip: Stick to official stores to dodge malware. For APKs, scan with antivirus apps like Avast. Stay safe!
Global Access: Find InShot in regional stores like Cafe Bazaar in Iran. It’s built for creators everywhere.
Reference: Google Play – InShot for download details.
Step 2: Import Your Media Correctly
Open InShot. Tap “Video.” Pick clips or photos from your gallery. Need a quick trim? Use the scissors icon.
Pro Tip: Sort media into folders first. It saves time. Choose high-res clips (1080p or better) for sharp 4K exports.
Watch Out: Low-quality videos look blurry. Always import clear, high-res footage to shine on Instagram.
Step 3: Trim and Split Clips

Tap a clip in the timeline. See the ✂ icon? Tap it, drag sliders to trim off extra bits.
Need to split? Move the playhead, tap “Split.” It cuts your clip into parts. Perfect for chopping intros.
Use Case: Trim boring starts for snappy Instagram Reels. Keep them 15–60 seconds to grab attention.
Advanced Tip: Split clips to add slow-motion or slick transitions. It makes dance videos pop.
Step 4: Crop or Resize Video

Tap “Canvas.” Pick sizes like 1:1 for Instagram posts or 9:16 for Stories and Reels. Pinch to zoom.
Need precision? Tap “Crop” to adjust the frame manually. Get the perfect shot every time.
Use Case: Turn wide videos vertical for TikTok or Instagram Stories. No awkward black bars.
Pro Tip: Save canvas settings. It keeps your brand’s look consistent across all videos.
Step 5: Change Background
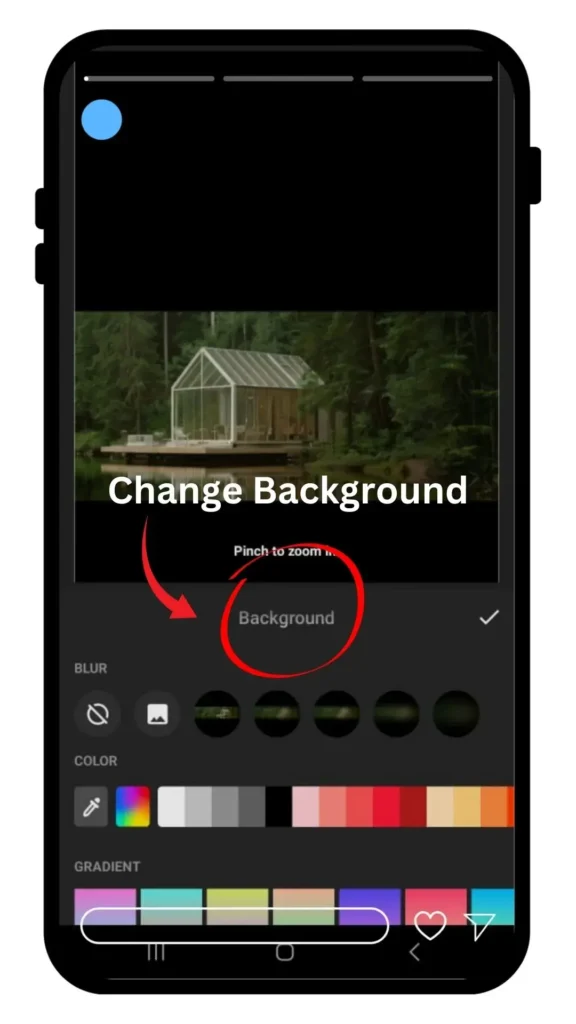
Tap “Canvas.” Choose a solid color, gradient, or blurry effect. Want something custom? Import a gallery image.
Use Case: Add blurred backgrounds to fill gaps in resized videos. Or use your logo for branding.
Advanced Tip: Try a green screen (chroma key) later. Swap backgrounds with cool visuals for next-level Reels.
Step 6: Add Audio or Music

Tap “Music.” Pick from four options. InShot’s library has royalty-free tracks. Or grab songs from your phone.
Extract audio from videos with “Music” > “Extract.” Need narration? Hit “Record” for voice overs.
How-To: Add a track. Adjust volume. Sync it to your timeline. Add fade-in or fade-out for smooth sound.
Free Music: Use Pixabay or InShot’s library to avoid copyright issues. Keep your videos safe.
Pro Tip: Lower music volume during voiceovers. Balanced audio sounds pro. Test it before exporting.
Global Touch: InShot’s auto-captions work in languages like Hindi or Spanish. Perfect for non-English fans.
Step 7: Apply Filters and Effects

Tap “Filter.” Try styles like “Bright,” “Vintage,” or “Cinematic.” Tweak brightness or contrast for the vibe.
Want flair? Tap “Effect.” Add glitch, zoom, or AI effects like neon or clone. They’re Instagram gold.
Use Case: “Cinematic” filters give Reels a movie-like feel. Perfect for travel or fashion clips.
Pro Tip: Go easy on effects. Too many look messy. Use keyframes for smooth effect changes.
Step 8: Customize Text
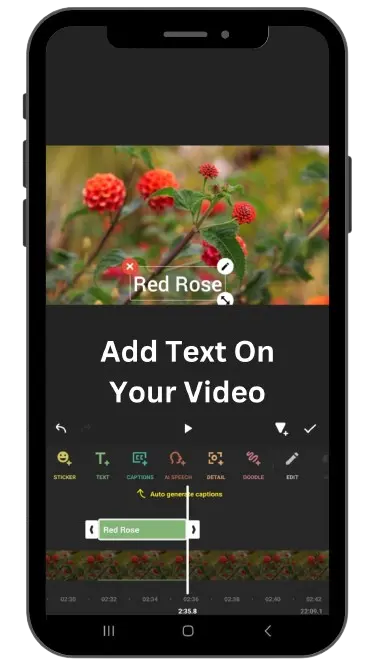
Tap “Text.” Type your message. Pick fonts, colors, or animations. Set duration in the timeline.
Use Case: Add captions for deaf viewers. Or drop catchy quotes to hook Instagram scrollers.
Advanced Tip: Use “Swipe in” animations. They grab eyes in the first 3 seconds of Reels.
Step 9: Add Stickers and PNGs

Tap “Sticker.” Add emojis, GIFs, or fun graphics like Cute Garden. They make Reels playful.
Got a logo? Import PNGs via “Sticker” > “Gallery.” Perfect for branding your videos.
Use Case: Animated stickers add fun. PNGs keep your brand consistent across Instagram.
Pro Tip: Tweak sticker transparency. Add shadows for a clean, polished look.
Step 10: Use Speed Controls

Tap “Speed.” Slide from 0.2x for slow-motion to 100x for fast-motion. Apply to clips or the whole video.
Use Case: Slow down dance moves. Speed up tutorials to fit Reels’ short format.
Advanced Tip: Split clips, then tweak speed. It creates epic slow-motion drops for Instagram.
Step 11: Add Transitions
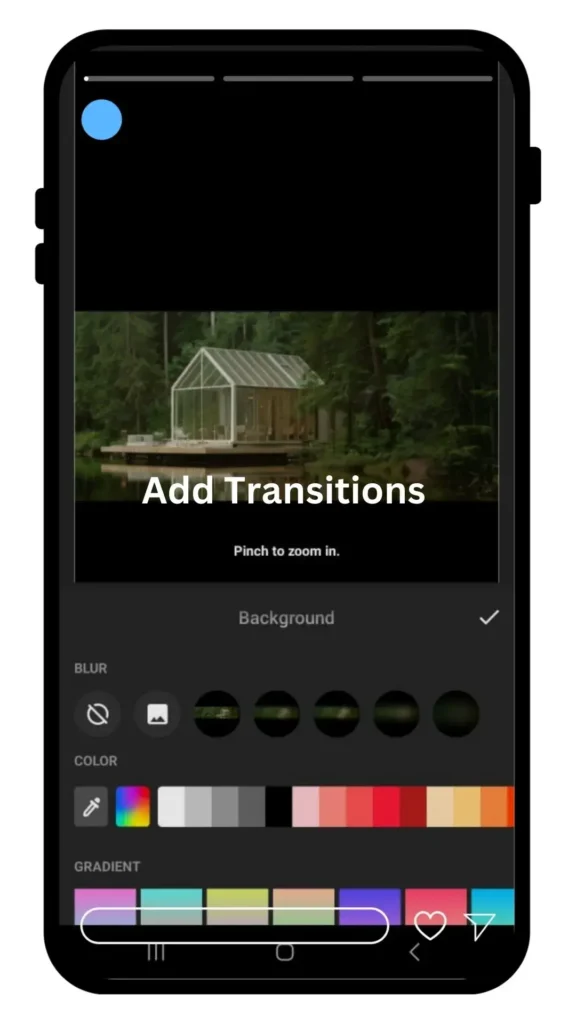
Split your clips. Tap the icon between them. Pick “Fade,” “Slide,” or “Zoom” for smooth flow.
Use Case: Transitions keep viewers glued to multi-clip Reels. No jarring cuts.
Pro Tip: Try “Shutter In” or “Spin Fall.” They add flair to Instagram dance or travel videos.
Step 12: Use Chroma Key (Green Screen)
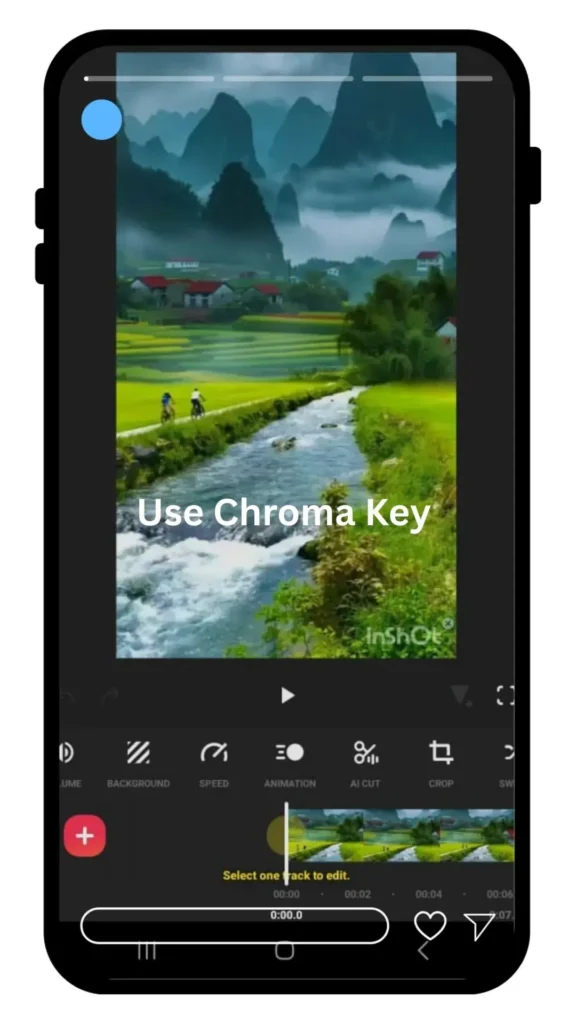
Import green screen footage. Tap “PIP.” Hit “Chroma.” Remove the green. Add a video or image background.
Use Case: Make reaction videos. Or drop yourself into cool settings for Instagram Stories.
Advanced Tip: Light your green screen evenly. It ensures clean, pro-looking results.
Step 13: AI Voice Generator
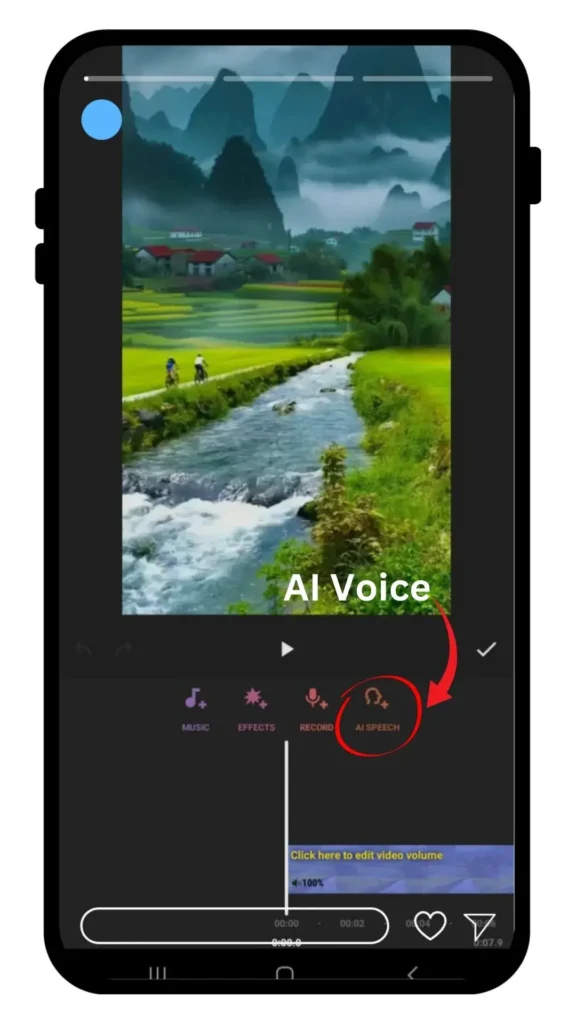
Tap “Text.” Choose “Text-to-Speech.” Pick a language like English or Spanish. Type your narration.
Use Case: Add voice overs for tutorials. Or narrate for accessibility without recording.
Pro Tip: Pair AI voice with auto-captions. It boosts engagement on Instagram globally.
Step 14: Convert Long Videos to Shorts
Import a long video. Trim to 15–60 seconds. Split for key moments. Set 9:16 for Reels.
Add text or stickers for punch. Make it snappy to grab attention fast.
Use Case: Turn YouTube vlogs into Instagram Shorts. Repurpose content like a pro.
Pro Tip: Hook viewers in 3 seconds. Bold text or music does the trick.
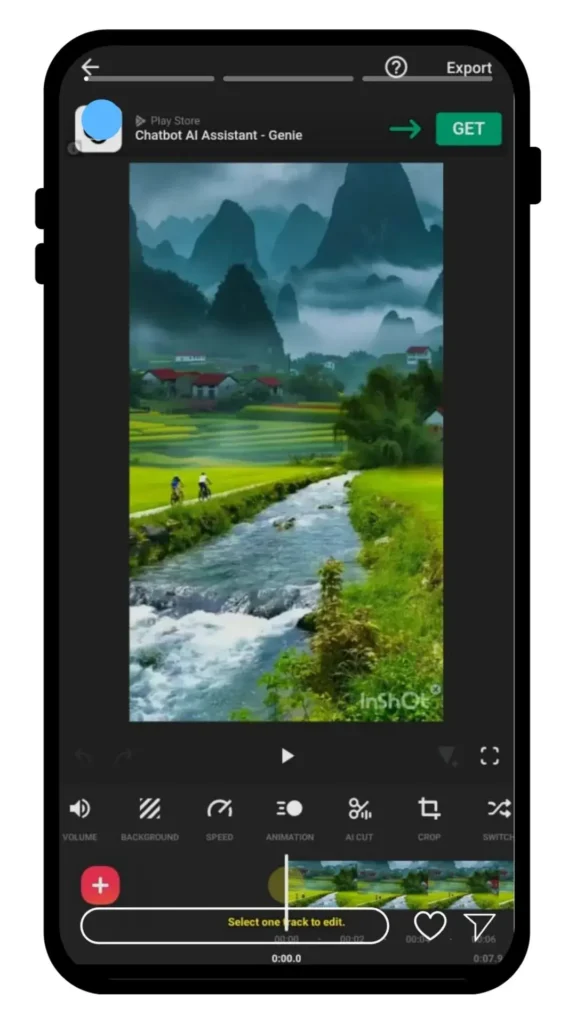
Step 15: Export in High Quality
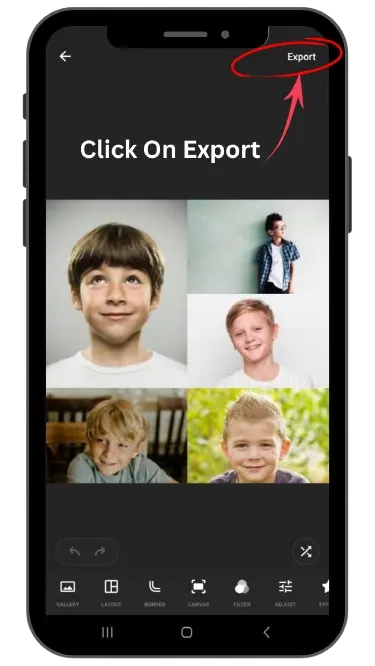
Tap “Save.” Pick 1080p or 4K. Choose 30fps or 60fps. Save to the gallery or share to Instagram.
Hate watermarks? Tap them, and watch an ad to remove them. Pro skips watermarks forever.
Advanced Editing Tips for InShot
Want your Instagram videos to stand out? These pro tricks take InShot to the next level. Let’s dive in!
1. Apply Cinematic Black Bars
Tap “Canvas.” Choose the 2.35:1 aspect ratio. Black bars appear, giving a movie-like vibe.
Use Case: Make travel vlogs or cinematic Instagram Reels feel epic. Perfect for scenic shots.
Pro Tip: Add the “Cinematic” filter. Toss in subtle zoom effects. Your video screams Hollywood.
Reference: InShot Official YouTube for canvas tutorials.
2. Stack Clips with Picture-in-Picture (PIP)
Tap “PIP.” Add a second video or image. Resize it, move it, add borders or shadows.
Use Case: Create reaction videos. Or overlay tutorial clips for Instagram how-tos. It grabs attention.
Pro Tip: Use keyframes. Animate PIP to slide or grow. It adds a dynamic story vibe.
3. Add Custom PNGs
Go to “Sticker,” hit “Gallery.” Import PNGs. Adjust size or transparency for a perfect fit.
Use Case: Slap on logos or custom graphics. Keep your Instagram brand consistent.
Pro Tip: Make PNGs with clear backgrounds in Canva. They blend seamlessly into videos.
Reference: Canva for PNG creation tips.
4. Use Multi-Track Audio
Tap “Music.” Add music, voiceovers, or sound effects. Adjust each track’s volume separately.
Use Case: Layer ocean sounds with narration for immersive travel vlogs. It pulls viewers in.
Pro Tip: Apply fade effects. Blend tracks smoothly. Your audio sounds clean and pro.
Reference: Pixabay for royalty-free sound effects.
5. Keyframe Animations
Select text or stickers. Tap “Keyframes.” Set positions at different points. Watch them move.
Use Case: Animate text to slide in for catchy Reels intros. It hooks viewers fast.
Pro Tip: Pair keyframes with transitions. It creates a smooth, polished flow for Instagram.Reference: TechWiser for keyframe insights.
Bonus Tip: Level Up with CapCut Desktop Video Editor
Need more power than InShot? Try CapCut on your PC. It’s a game-stealer for advanced edits.
Why CapCut? It offers pro tools InShot lacks. Think multi-layer editing, motion tracking, and AI magic. Perfect for desktop creators.
Key Features:
- Multi-layer editing handles complex projects.
- AI auto-captions and background removal save time.
- Precise keyframes create slick animations.
How to Create Videos: Import clips. Use the timeline to layer footage. Add effects. Export in crisp 4K.
When to Use: Pick CapCut for long YouTube videos or heavy effects. Use InShot for quick Instagram edits.Global Access: CapCut supports languages like Hindi and Spanish. Runs on basic PCs for creators worldwide.
Download and Install CapCut

Common Mistakes to Avoid
New to InShot? Dodge these slip-ups to keep your Instagram videos sharp and pro.
Overusing Effects: Piling on filters or transitions looks messy. Pick one or two per video. Keep it clean.
Ignoring Audio Balance: Loud music buries voiceovers. Test audio levels before exporting. Clear sound wins viewers.
Wrong Aspect Ratios: Wrong sizes get cropped on Instagram. Use 9:16 for Reels, 1:1 for posts. Nail the fit.
Not Saving Drafts: InShot might lose edits if it crashes. Save drafts often. Protect your hard work.
Using Copyrighted Music: Popular songs trigger strikes. Stick to InShot’s library or Pixabay. Stay safe, stay online.
Best Practices for Video Editing
Want Instagram Reels that pop? Follow these tips to create videos that grab attention.
Plan Your Video: Sketch a storyboard or outline. Know your story before editing. It saves time, boosts quality.
Hook in 3 Seconds: Bold text, catchy music, or striking visuals stop scrollers. Make Reels grab eyes fast.
Optimize for Platform: Set 9:16 for Reels, 15–60 seconds long. Add captions for Instagram. Fit the vibe perfectly.
Test Exports: Preview videos on Instagram. Check for cropping or quality issues. Fix mistakes before posting.
Engage with Trends: Use InShot’s trending audio or effects. Jump on viral sounds to boost discoverability.
FAQs
Conclusion
InShot Pro is your ticket to killer Instagram videos. It’s easy, packed with tools like green screen, AI effects, and multi-track audio. Beginners can jump in fast. Pros can craft viral Reels. This guide showed you every step—downloading, editing, and exporting like a champ.
Get Started: Download InShot Pro now. Follow these steps, create epic Reels, and share with #InShot. You might get featured!
Final Thoughts: Practice makes perfect. Play with InShot’s features. Ride Instagram trends. Use this guide to shine online. Your next video could blow up!


You’ve written something that not only informs, but also inspires a sense of wonder and possibility.